FriendZone Writeup w/o Metasploit
Reconnaissance
First thing first, we run a quick initial nmap scan to see which ports are open and which services are running on those ports.
-sC: run default nmap scripts
-sV: detect service version
-O: detect OS
-oA: output all formats and store in file initial
We get back the following result showing that seven ports are open:
Port 21: running ftp vsftpd 3.0.3
Port 22: running OpenSSH 7.6p1 Ubuntu 4
Port 53: running ISC BIND 9.11.3–1ubuntu1.2 (DNS)
Ports 80 & 443: running Apache httpd 2.4.29
Ports 139 and 145: Samba smbd 4.7.6-Ubuntu
Before we start investigating these ports, let’s run more comprehensive nmap scans in the background to make sure we cover all bases.
Let’s run an nmap scan that covers all ports.
We get back the following result. No other ports are open.
Similarly, we run an nmap scan with the -sU flag enabled to run a UDP scan.
I managed to root the box and write this blog while the UDP scan did not terminate. So instead I ran a scan for the top 1000 ports.

Two ports are open.
Port 53: running DNS
Port 137: running SMB
Before we move on to enumeration, let’s make a few mental notes about the nmap scan results.
The -sC flag checks for anonymous login when it encounters an FTP port. Since the output did not include that anonymous login is allowed, then it’s likely that we’ll need credentials to access the FTP server. Moreover, the version is 3.0.3 which does not have any critical exploits (most FTP exploits are for version 2.x). So FTP is very unlikely to be our point of entry.
Similar to FTP, there isn’t many critical exploits associated with the version of SSH that is being used, so we’ll need credentials for this service as well.
Port 53 is open. The first thing we need to do for this service is get the domain name through nslookup and attempt a zone transfer to enumerate name servers, hostnames, etc. The ssl-cert from the nmap scan gives us the common name friendzone.red. This could be our domain name.
Ports 80 and 443 show different page titles. This could be a virtual hosts routing configuration. This means that if we discover other hosts we need to enumerate them over both HTTP and HTTPS since we might get different results.
SMB ports are open. We need to do the usual tasks: check for anonymous login, list shares and check permissions on shares.
We have so many services to enumerate!
Enumeration
I always start off with enumerating HTTP first. In this case both 80 and 443 are open so we’ll start there.
Ports 80 & 443
Visit the site on the browser.

We can see the email is info@friendzoneportal.red. The friendzoneportal.red could be a possible domain name. We’ll keep it in mind when enumerating DNS.
View the source code to see if we can find any other information.
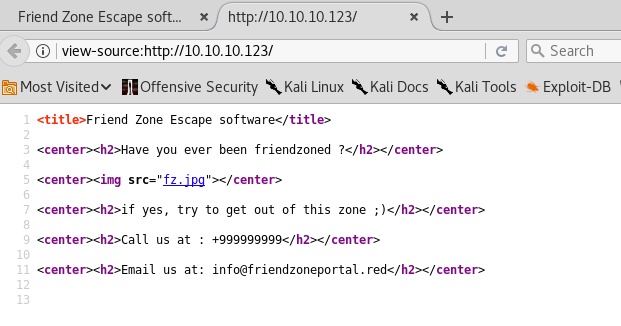
Nope. Next, run gobuster to enumerate directories.
We get back the following result.
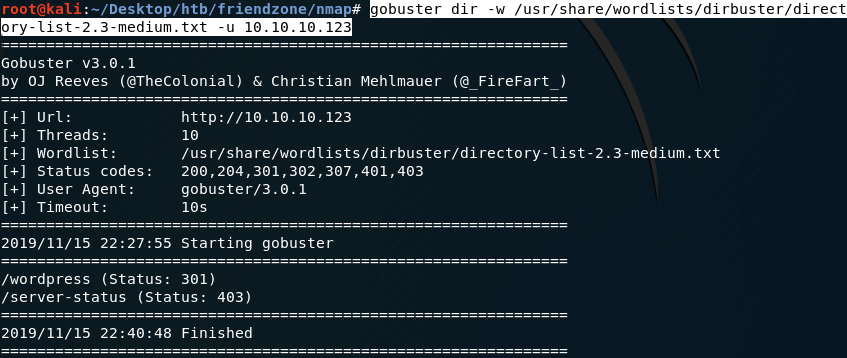
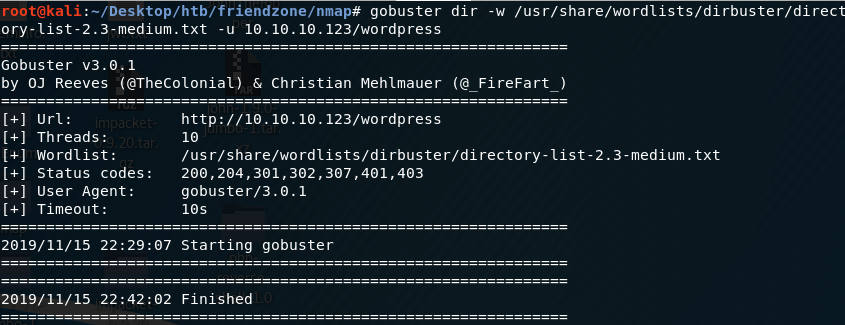
The /wordpress directory doesn’t reference any other links. So I ran gobuster on the /wordpress directory as well and didn’t get anything useful.
Visiting the site over HTTPS (port 443) gives us an error.
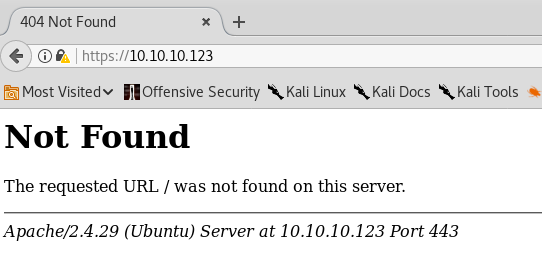
Therefore, let’s move on to enumerating DNS.
Port 53
Try to get a domain name for the IP address using nslookup.

We don’t get anything. However, we do have two possible domains from previous enumeration steps:
friendzone.red from the nmap scan, and
friendzoneportal.red from the HTTP website
Let’s try a zone transfer on both domains.
Open to the zonetransfer.txt file to see if we got any subdomains.
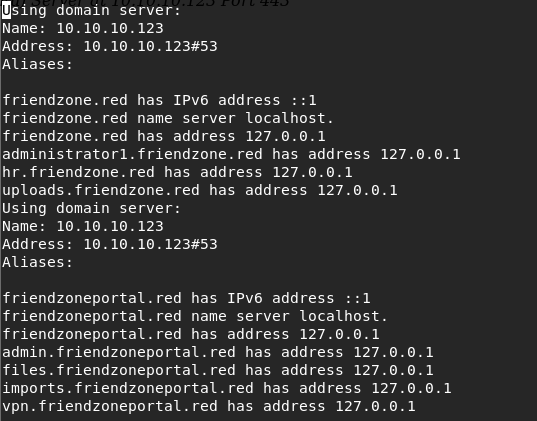
Add all the domains/subdomains in the /hosts/etc file.
Now we start visiting the subdomains we found. Remember that we have to visit them over both HTTP and HTTPS because we’re likely to get different results.
The following sites showed us particularly interesting results.
https://admin.friendzoneportal.red/ and https://administrator1.friendzone.red/ have login forms.
https://uploads.friendzone.red/ allows you to upload images.
I tried default credentials on the admin sites but that didn’t work. Before we run a password cracker on those two sites, let’s enumerate SMB. We might find credentials there.
Ports 139 & 445
Run smbmap to list available shares and permissions.
-H: host
We get back the following result.

We have READ access on the general share and READ/WRITE access on the Development share. List the content of the shares.
-R: Recursively list directories and files on all accessible shares
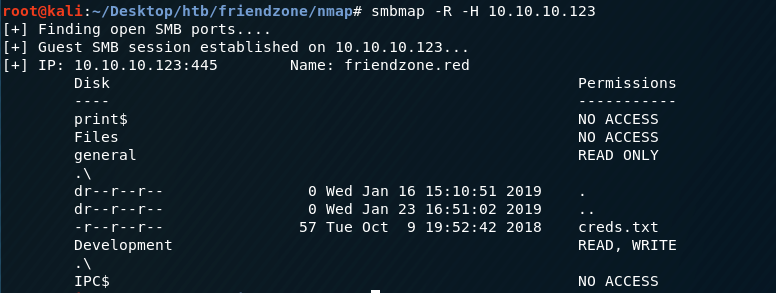
The Development share does not contain anything, but the general directory has a file named creds.txt! Before we download the file, let’s use smbclient to view more information about the shares.
-L: look at what services are available on a server
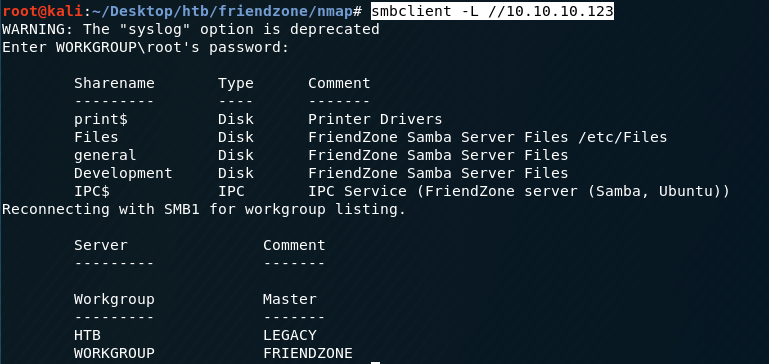
The extra information this gives us over smbmap is the Comment column. We can see that the files in the Files share are stored in /etc/Files on the system. Therefore, there’s a good possibility that the files stored in the Development share (which we have WRITE access to) are stored in /etc/Development. We might need this piece of information in the exploitation phase.
Let’s get the creds.txt file. First, login anonymously (without a password) into the general share.
-N: suppresses the normal password prompt from the client to the user

Download the creds.txt file from the target machine to the attack machine.
View the content of the file.
We have admin credentials!
Try the credentials on FTP.

Doesn’t work. Next, try SSH.

Also doesn’t work. Next, try it on the https://admin.friendzoneportal.red/ login form we found.

Also doesn’t work. Next, try the credentials on the https://administrator1.friendzone.red/ login form.

We’re in! Visit the /dashboard.php page.
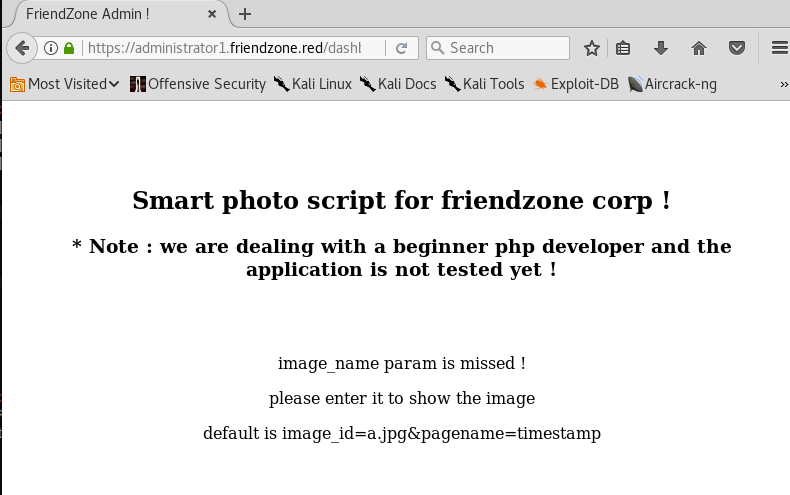
It seems to be a page that allows you to view images on the site. We’ll try to gain initial access through this page.
Gaining an Initial Foothold
The dashboard.php page gives us instructions on how to view an image. We need to append the following to the URL.
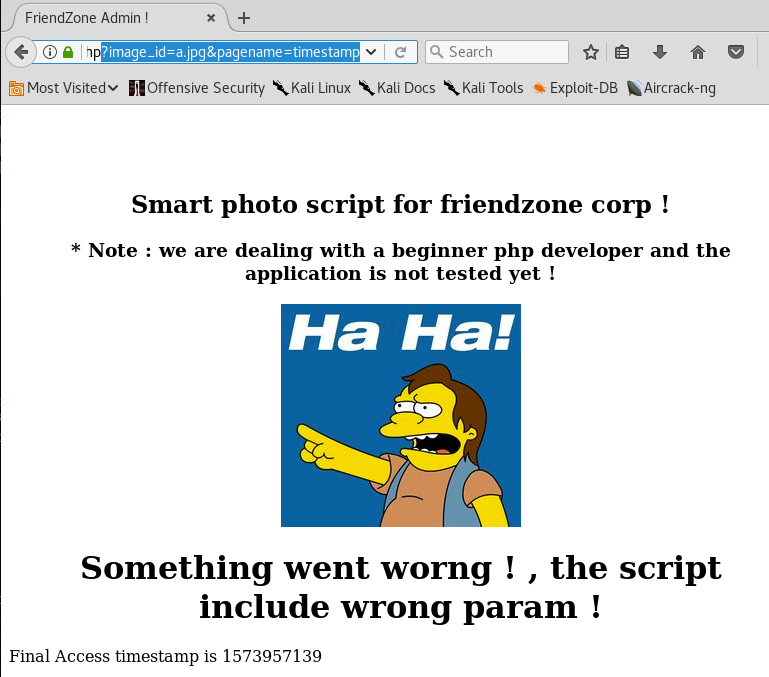
Let’s put that timestamp number in the pagename URL parameter. After we do that we no longer get a “Final Access timestamp…” message.
During our enumeration phase, we found a URL https://uploads.friendzone.red/ that allows us to upload images. Let’s try and see if the images we upload there can be viewed through the dashboard page.
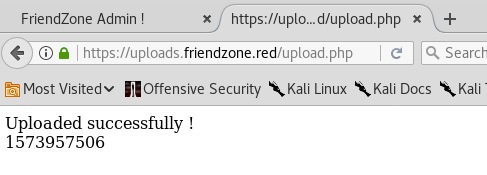
When we successfully upload the image random.jpg we get a timestamp. Let’s use the image and timestamp on the dashboard page.
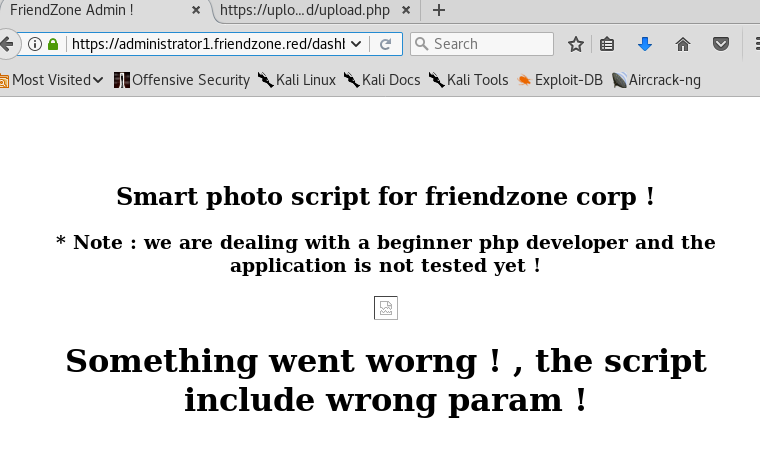
Nope, it doesn’t find the image. Let’s move our focus to the pagename parameter. It seems to be running a timestamp script that generates a timestamp and outputs it on the page. Based on the way the application is currently working, my gut feeling is that it takes the filename “timestamp” and appends “.php” to it and then runs that script. Therefore, if this is vulnerable to LFI, it would be difficult to disclose sensitive files since the “.php” extension will get added to my query.
Instead, let’s try first uploading a php file and then exploiting the LFI vulnerability to output something on the page. During the enumeration phase, we found that we have READ and WRITE permissions on the Development share and that it’s likely that the files uploaded on that share are stored in the location /etc/Development (based on the Comments column).
Let’s create a simple test.php script that outputs the string “It’s working!” on the page.
Log into the Development share.
Download the test.php file from the attack machine to the share.
Test it on the site.
Remember not to include the .php extension since the application already does that for you.
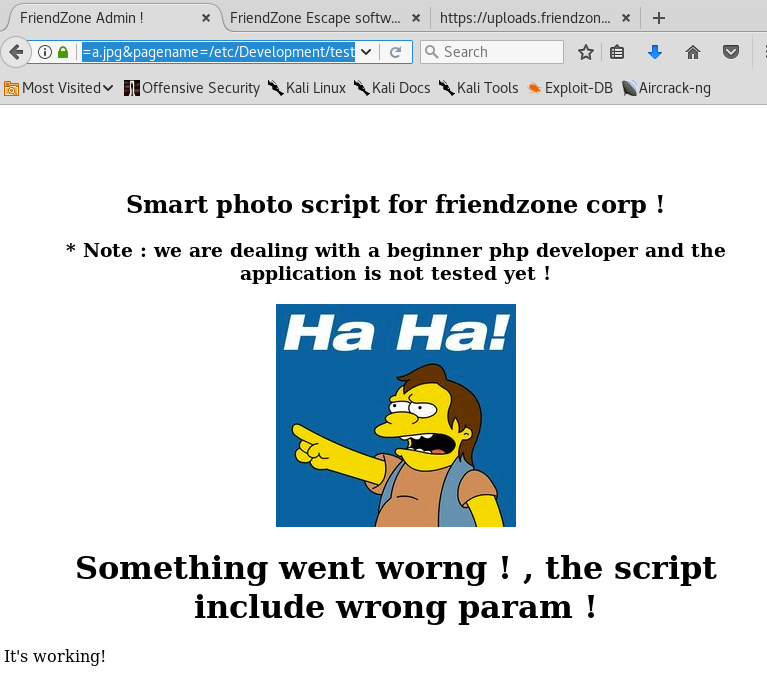
Perfect, it’s working! The next step is to upload a php reverse shell. Grab the reverse shell from pentestmonkey and change the IP address and port configuration.
Upload it in the same manner as we did with the test.php file. Then setup a listener on the attack machine.
Execute the reverse shell script from the website.
We have a shell!

Let’s upgrade it to a better shell.
This gives us a partially interactive bash shell. To get a fully interactive shell, background the session (CTRL+ Z) and run the following in your terminal which tells your terminal to pass keyboard shortcuts to the shell.
Once that is done, run the command “fg” to bring netcat back to the foreground. Then use the following command to give the shell the ability to clear the screen.
Now that we have an interactive shell, let’s see if we have enough privileges to get the user.txt flag.
We need to escalate privileges to get the root flag.
Privilege Escalation
We have rwx privileges on the /etc/Development directory as www-data. So let’s upload the LinEnum script in the Development share.
In the target machine, navigate to the /etc/Development directory.
Give the script execute permissions.
I don’t seem to have execute permissions in that directory, so I’ll copy it to the tmp directory.
Navigate to the /tmp directory and try again.
That works, so the next step is to execute the script.
The results from LinEnum don’t give us anything that we could use to escalate privileges. So let’s try pspy. If you don’t have the script, you can download it from the following github repository.
Upload it and run it on the attack machine in the same way we did for LinEnum.
After a minute or two we see an interesting process pop up

It seems that the reporter.py script is getting executed every couple of minutes as a scheduled task. Let’s view the permissions we have on that file.

We only have read permission. So let’s view the content of the file.
Here’s the soure code of the script.
Most of the script is commented out so there isn’t much to do there. It does import the os module. Maybe we can hijack that. Locate the module on the machine.

Navigate to the directory and view the permissions on the file

We have rwx privileges on the os.py module! This is obviously a security misconfiguration. As a non-privileged user, I should only have read access to the script. If we add a reverse shell to the script and wait for the root owned scheduled task to run, we’ll get back a reverse shell with root privileges!
I tried accessing the os.py script using vi but the terminal was a bit screwed up. Here’s a way to fix it (courtesy of ippsec).
Go to a new pane in the attack machine and enter the following command.

We need to set the rows to 29 and the columns to 113. Go back to the netcat session and run the following command.
Even after this, vi was still a bit glitchy, so instead, I decided to download the os.py module to my attack machine using SMB, add the reverse shell there and upload it back to the target machine.
Add the following reverse shell code to the bottom of the os.py file and upload it back to the target machine.
Setup a listener on the attack machine.
Wait for the scheduled task to run the reporter.py script that will in turn call the os.py module which contains our reverse shell code.

We get back a shell running with root privileges! Grab the root.txt flag.
Lessons Learned
To gain an initial foothold on the box we exploited six vulnerabilities.
The ability to perform a zone transfer which allowed us to get a list of all hosts for the domain. To prevent this vulnerability from occurring, the DNS server should be configured to only allow zone transfers from trusted IP addresses. It is worth noting that even if zone transfers are not allowed, it is still possible to enumerate the list of hosts through other (not so easy) means.
Enabling anonymous login to an SMB share that contained sensitive information. This could have been avoided by disabling anonymous / guest access on SMB shares.
If anonymous login was not bad enough, one of the SMB shares also had WRITE access on it. This allowed us to upload a reverse shell. Again, restrictions should have been put in place on the SMB shares preventing access.
Saving credentials in plaintext in a file on the system. This is unfortunately very common. Use a password manager if you’re having difficulty remembering your passwords.
A Local File Inclusion (LFI) vulnerability that allowed us to execute a file on the system. Possible remediations include maintaining a white list of allowed files, sanitize input, etc.
Security misconfiguration that gave a web dameon user (www-data) the same permissions as a regular user on the system. I shouldn’t have been able to access the user.txt flag while running as a www-data user. The system administrator should have conformed to the principle of least privilege and the concept of separation of privileges.
To escalate privileges we exploited one vulnerability.
A security misconfiguration of a python module. There was a scheduled task that was run by root. The scheduled task ran a script that imported the os.py module. Usually, a regular user should only have read access to such modules, however it was configured as rwx access for everyone. Therefore, we used that to our advantage to hijack the python module and include a reverse shell that eventually ran with root privileges. It is common that such a vulnerability is introduced into a system when a user creates their own module and forgets to restrict write access to it or when the user decides to lessen restrictions on a current Python module. For this machine, we encountered the latter. The developer should have been very careful when deciding to change the default configuration of this specific module.
Last updated